

Organization settings
View and update your organization’s details, branding, and delivery addresses.
Who can do this: Admin.
touring the Organization page tabs
users-and-organization-organization-settings.mp4- Click Organization in the sidebar.
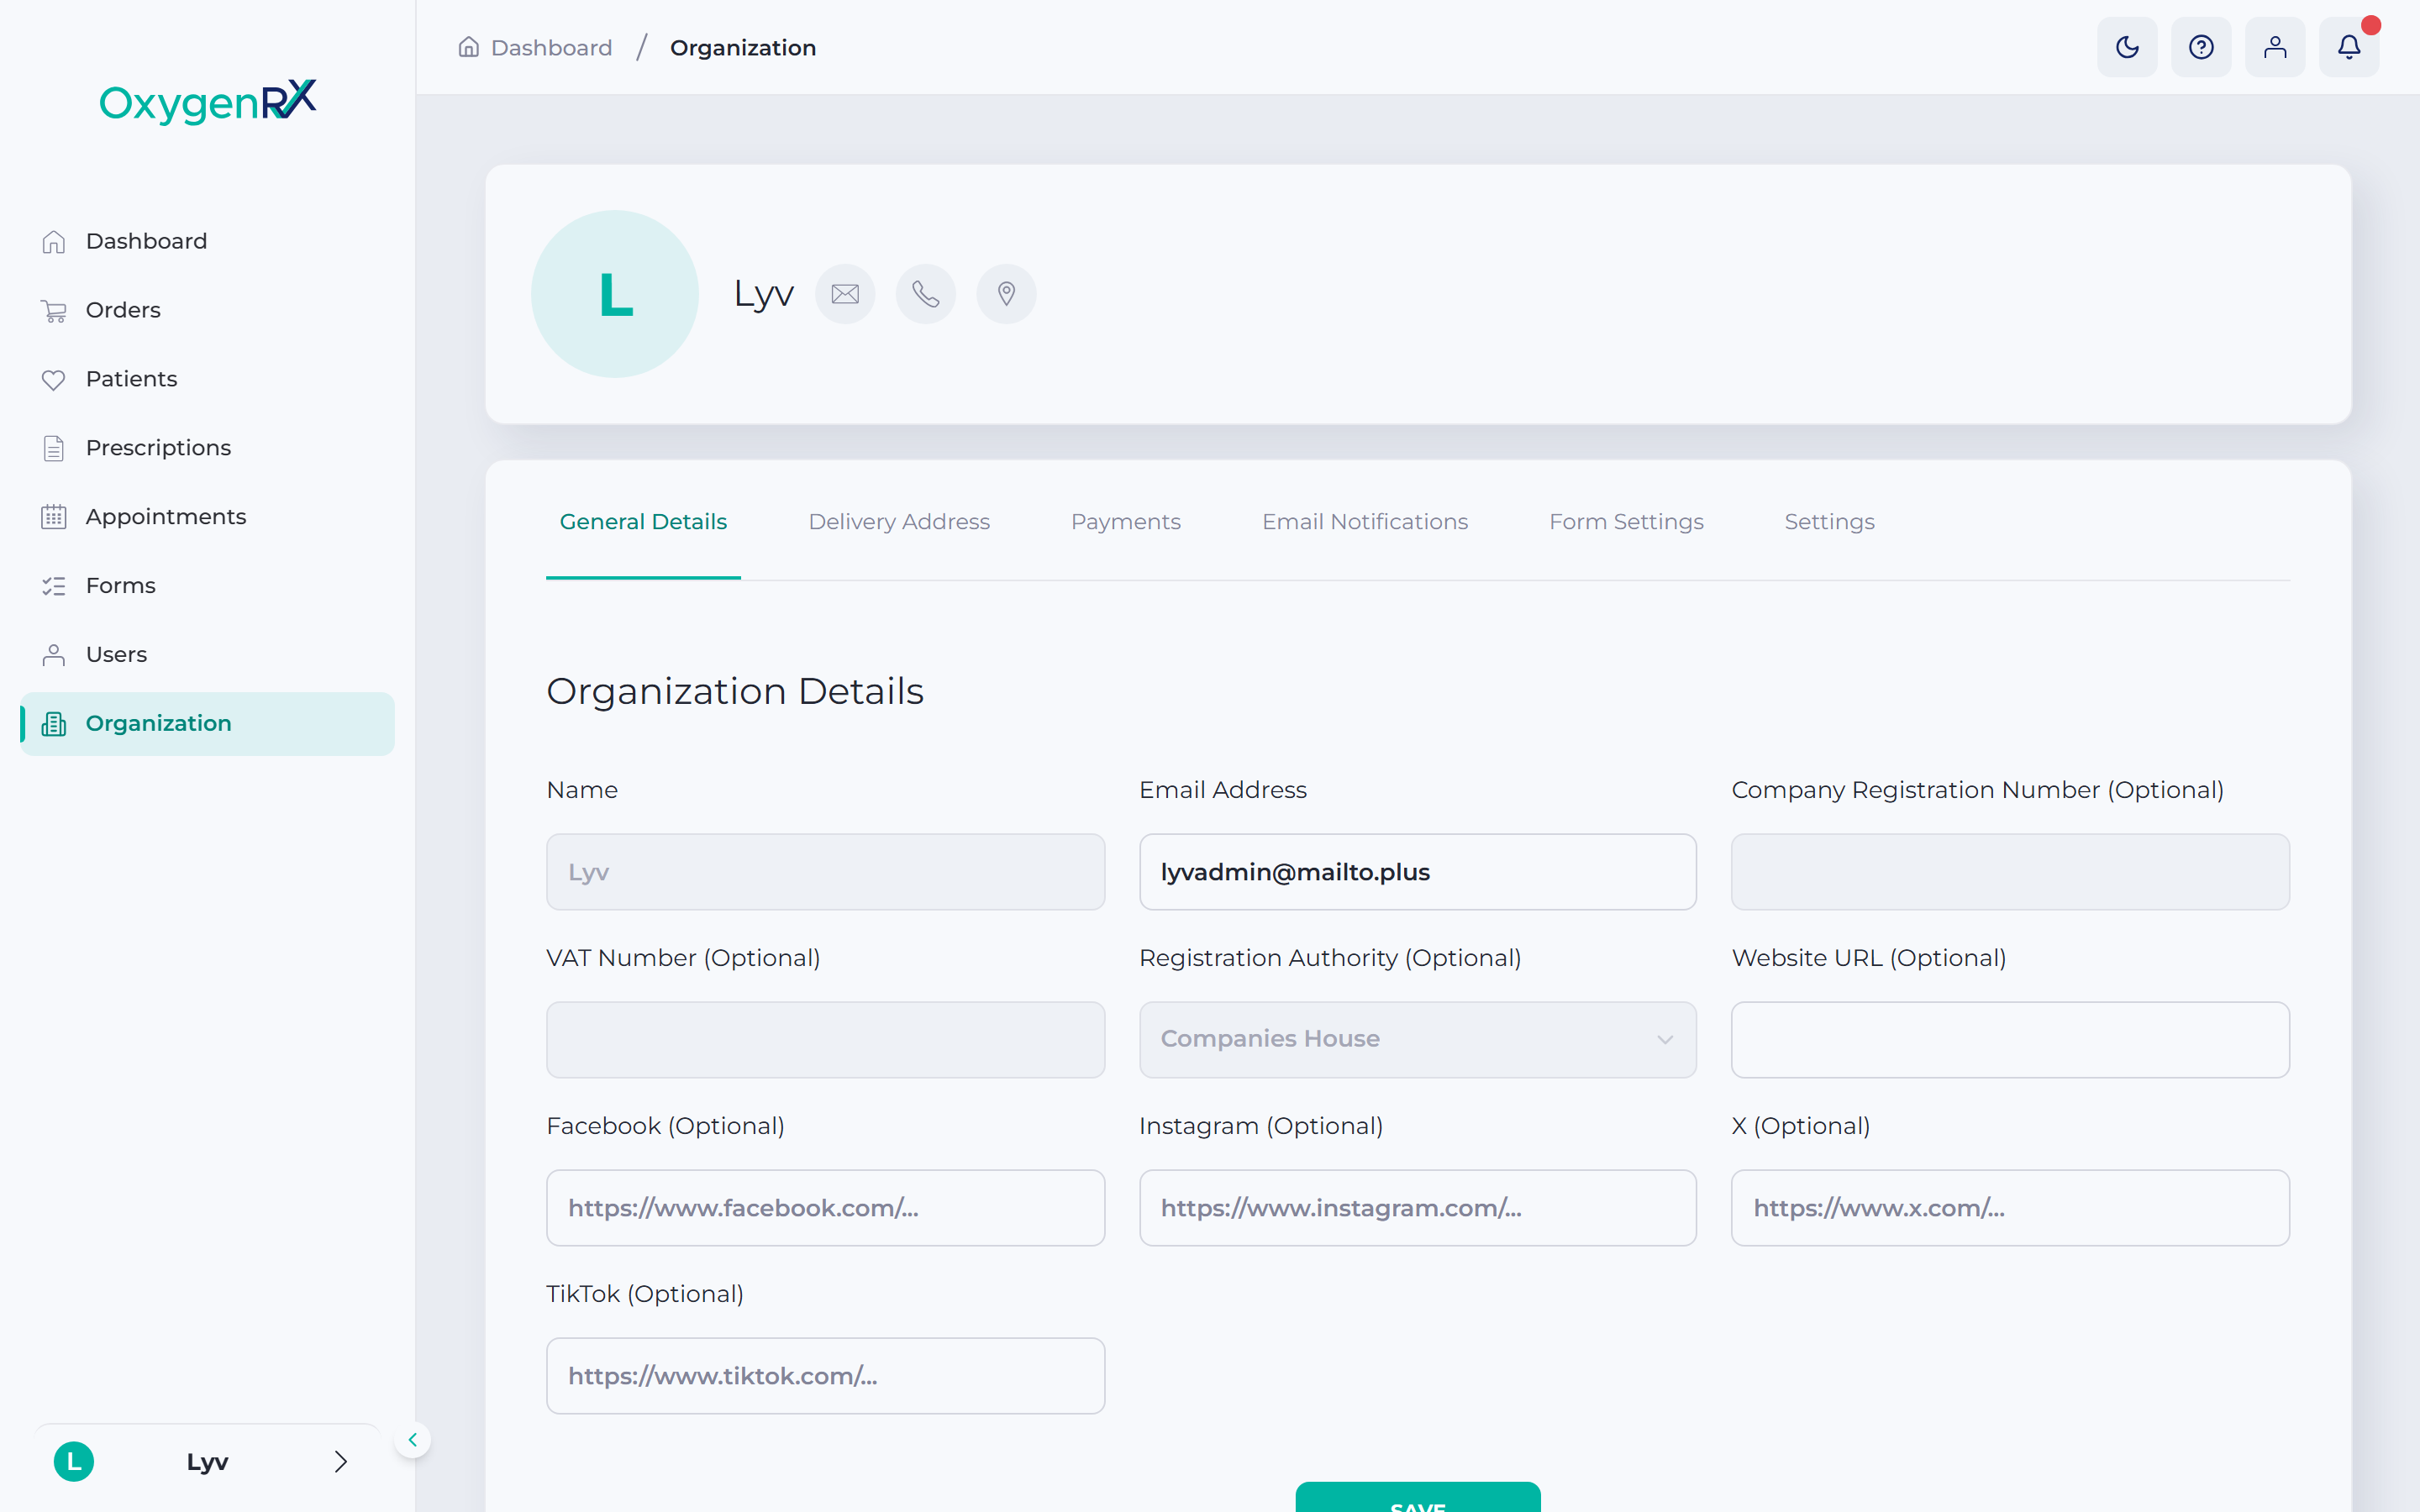
- Choose a tab: General Details, Delivery Address, Email Notifications, Form Settings, or Settings.
The page opens on General Details. The Settings tab only appears once a Platform Admin turns on API access. This is a setting that connects Oxygen to other software your organization uses. Most organizations won’t need it.
General Details
Section titled “General Details”Update your organization’s email, website, and social links.
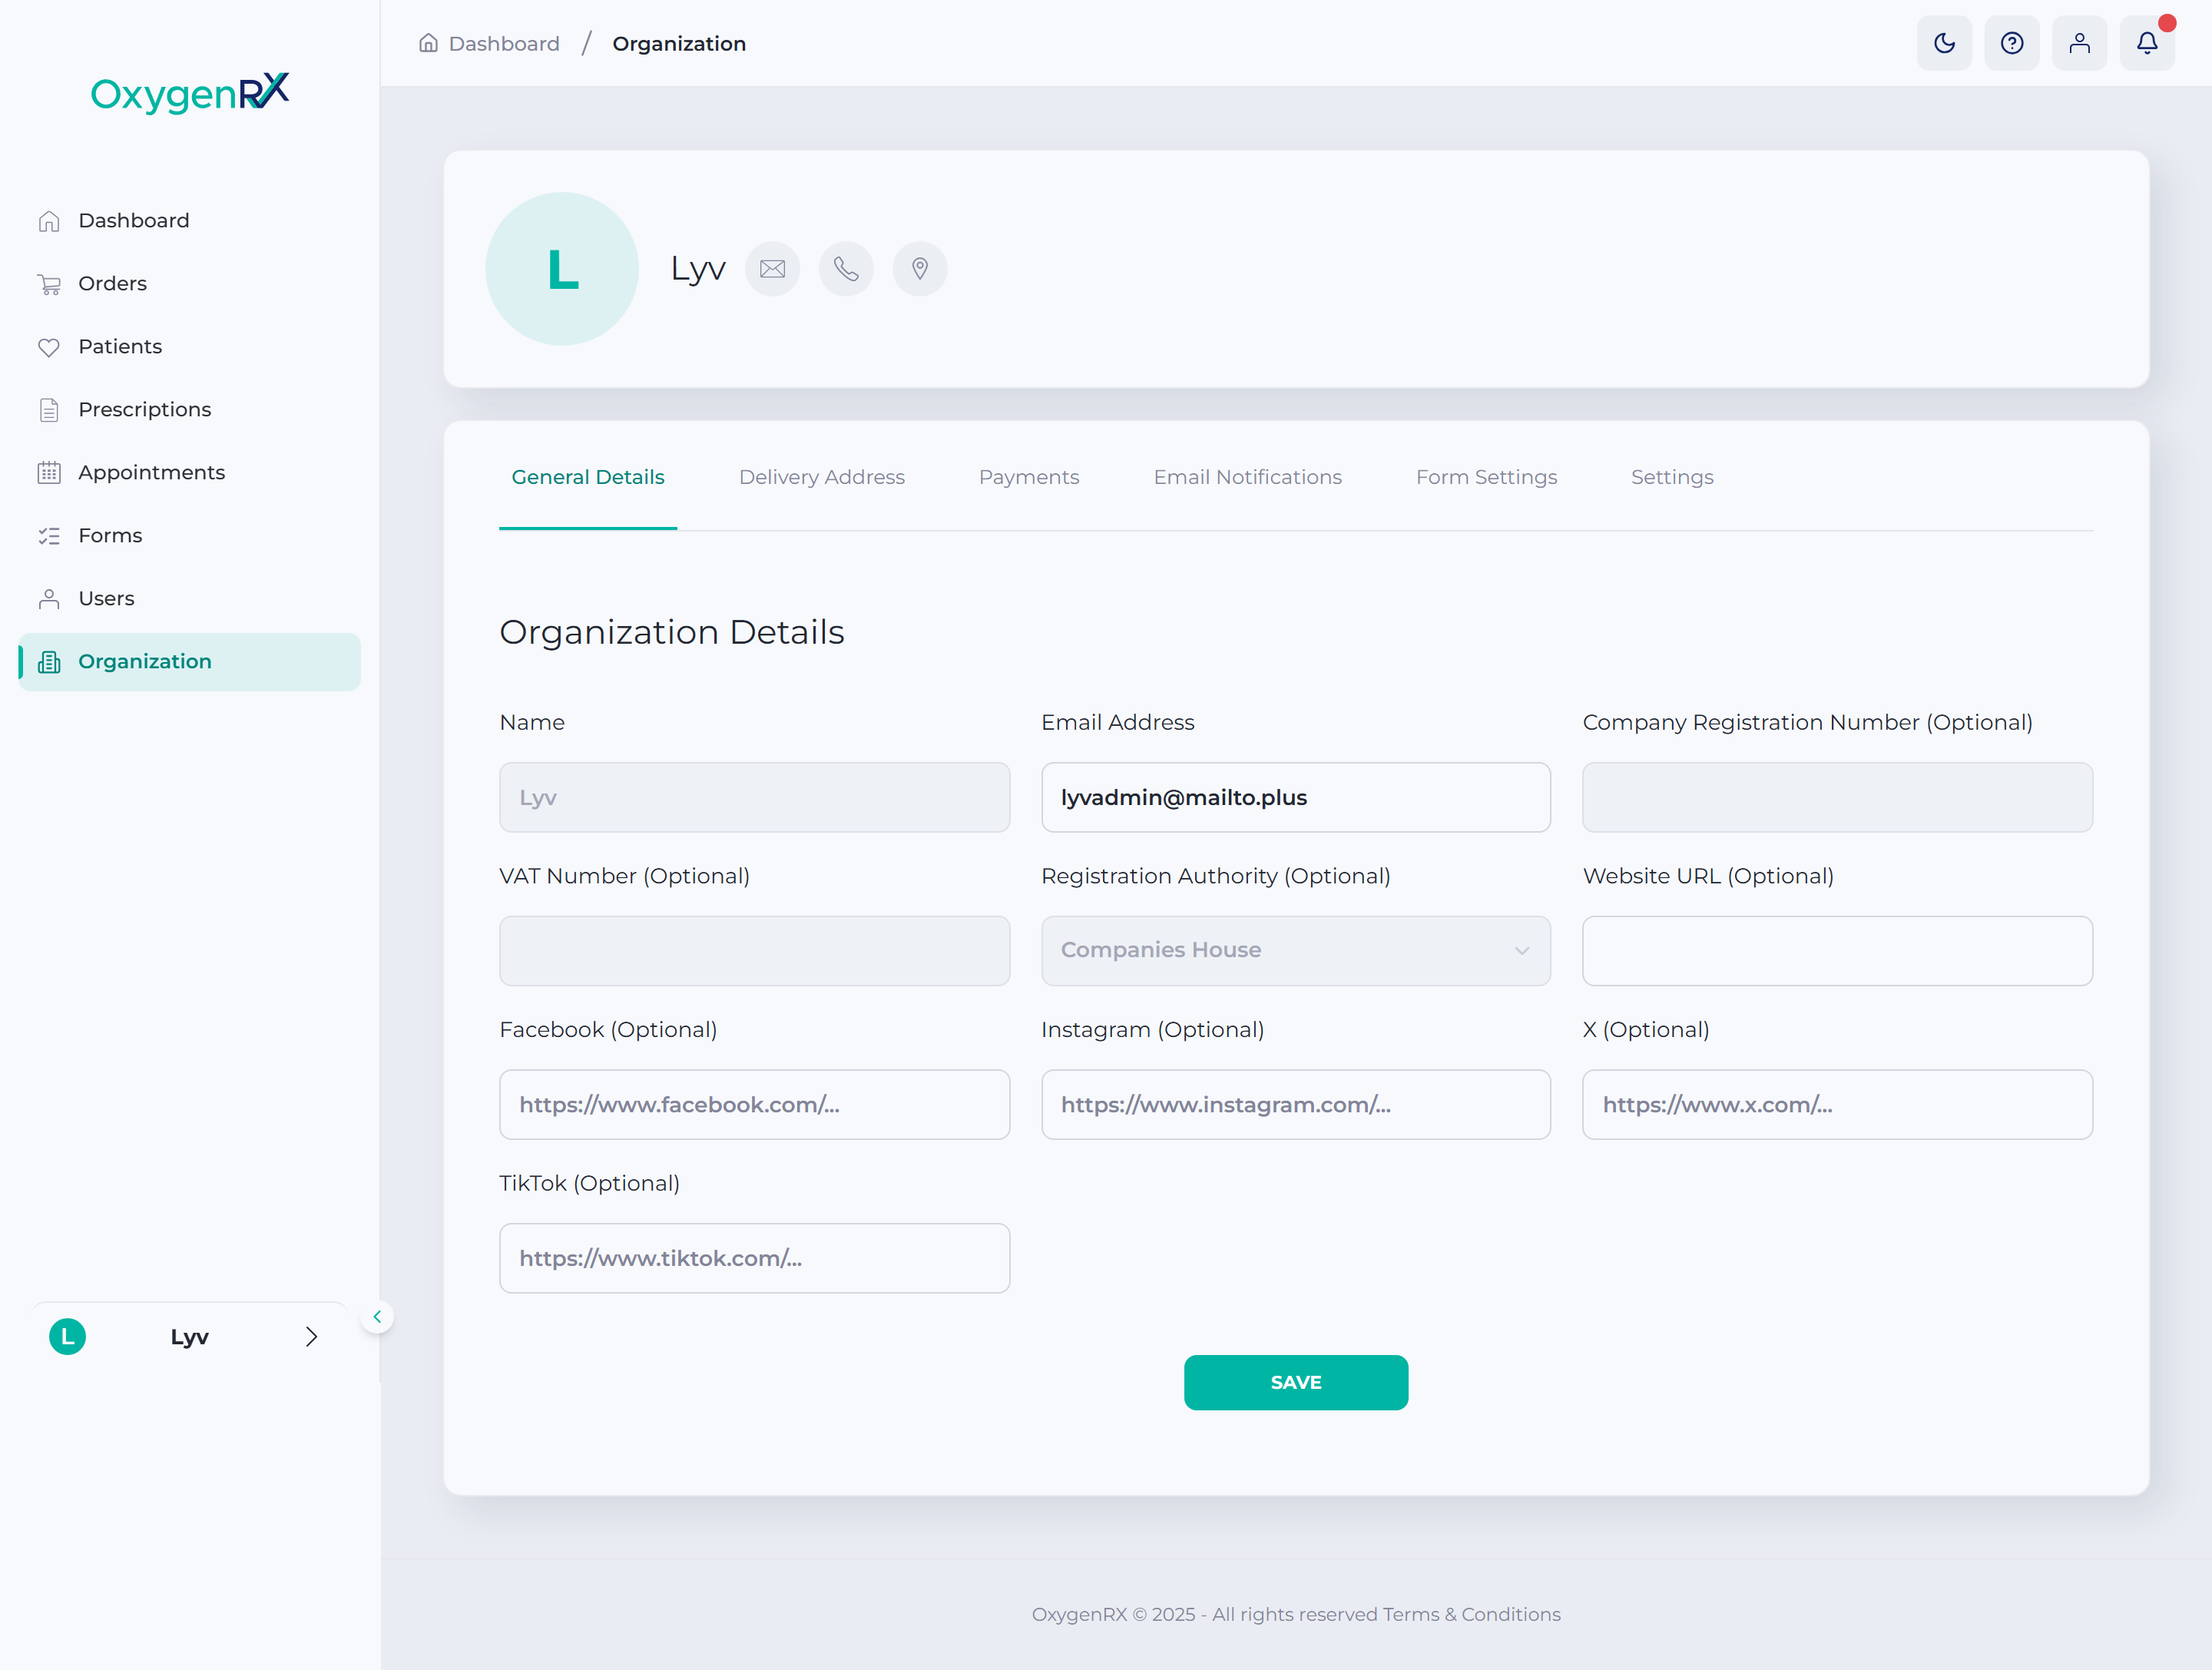
You can edit Email Address and Website URL (Optional). You can also edit your Facebook (Optional), Instagram (Optional), X (Optional), and TikTok (Optional) links. Name, Company Registration Number (Optional), VAT Number (Optional), and Registration Authority (Optional) are locked. Only a Platform Admin can change them. Click Save when you’re done.
Delivery Address
Section titled “Delivery Address”Manage the addresses your orders are delivered to.
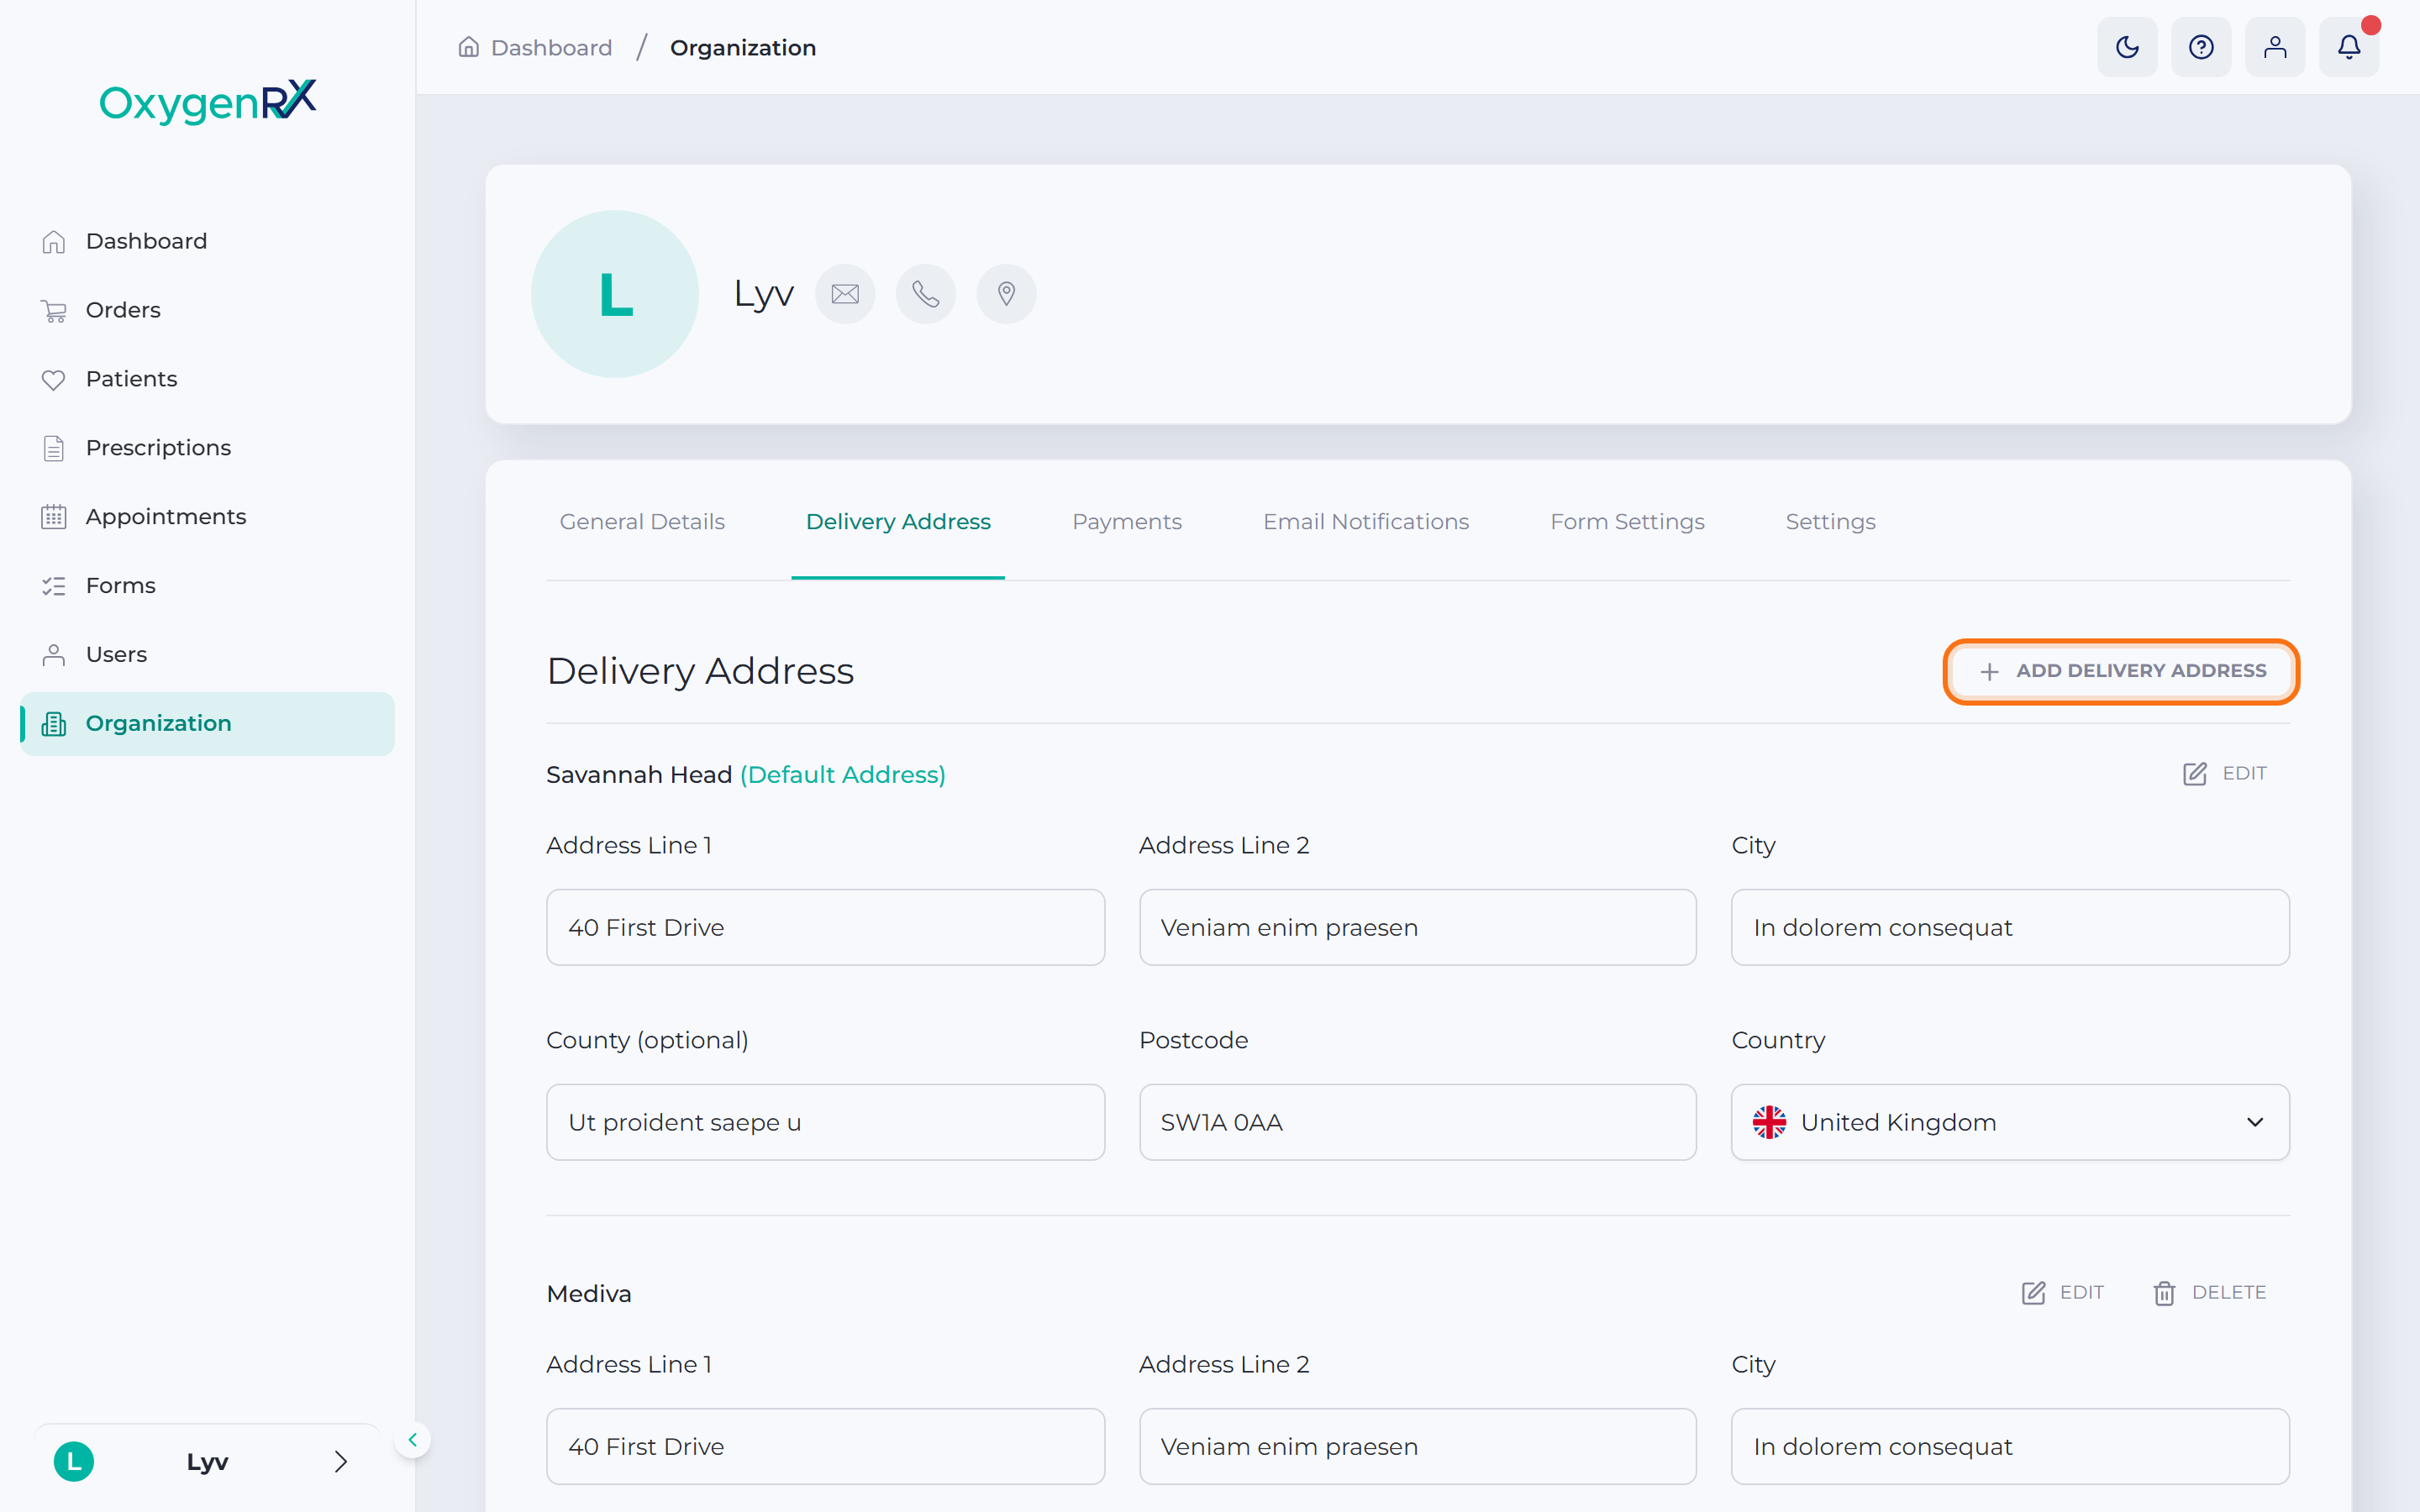
- Click Add Delivery Address to create one, or the pencil icon to edit an existing one.
- Fill in Address Line 1, City, Postcode, and Country — all required. Address Line 2 (optional) and County (optional) aren’t.
- Switch on Set as Default Address if this should be your main address.
- Click Confirm (or Update when editing).
Your default address is marked (Default Address) and can’t be deleted. Click the trash icon on any other address to remove it.
Email Notifications
Section titled “Email Notifications”Set the logo, sender name, address, and colors used in every email Oxygen sends your patients.
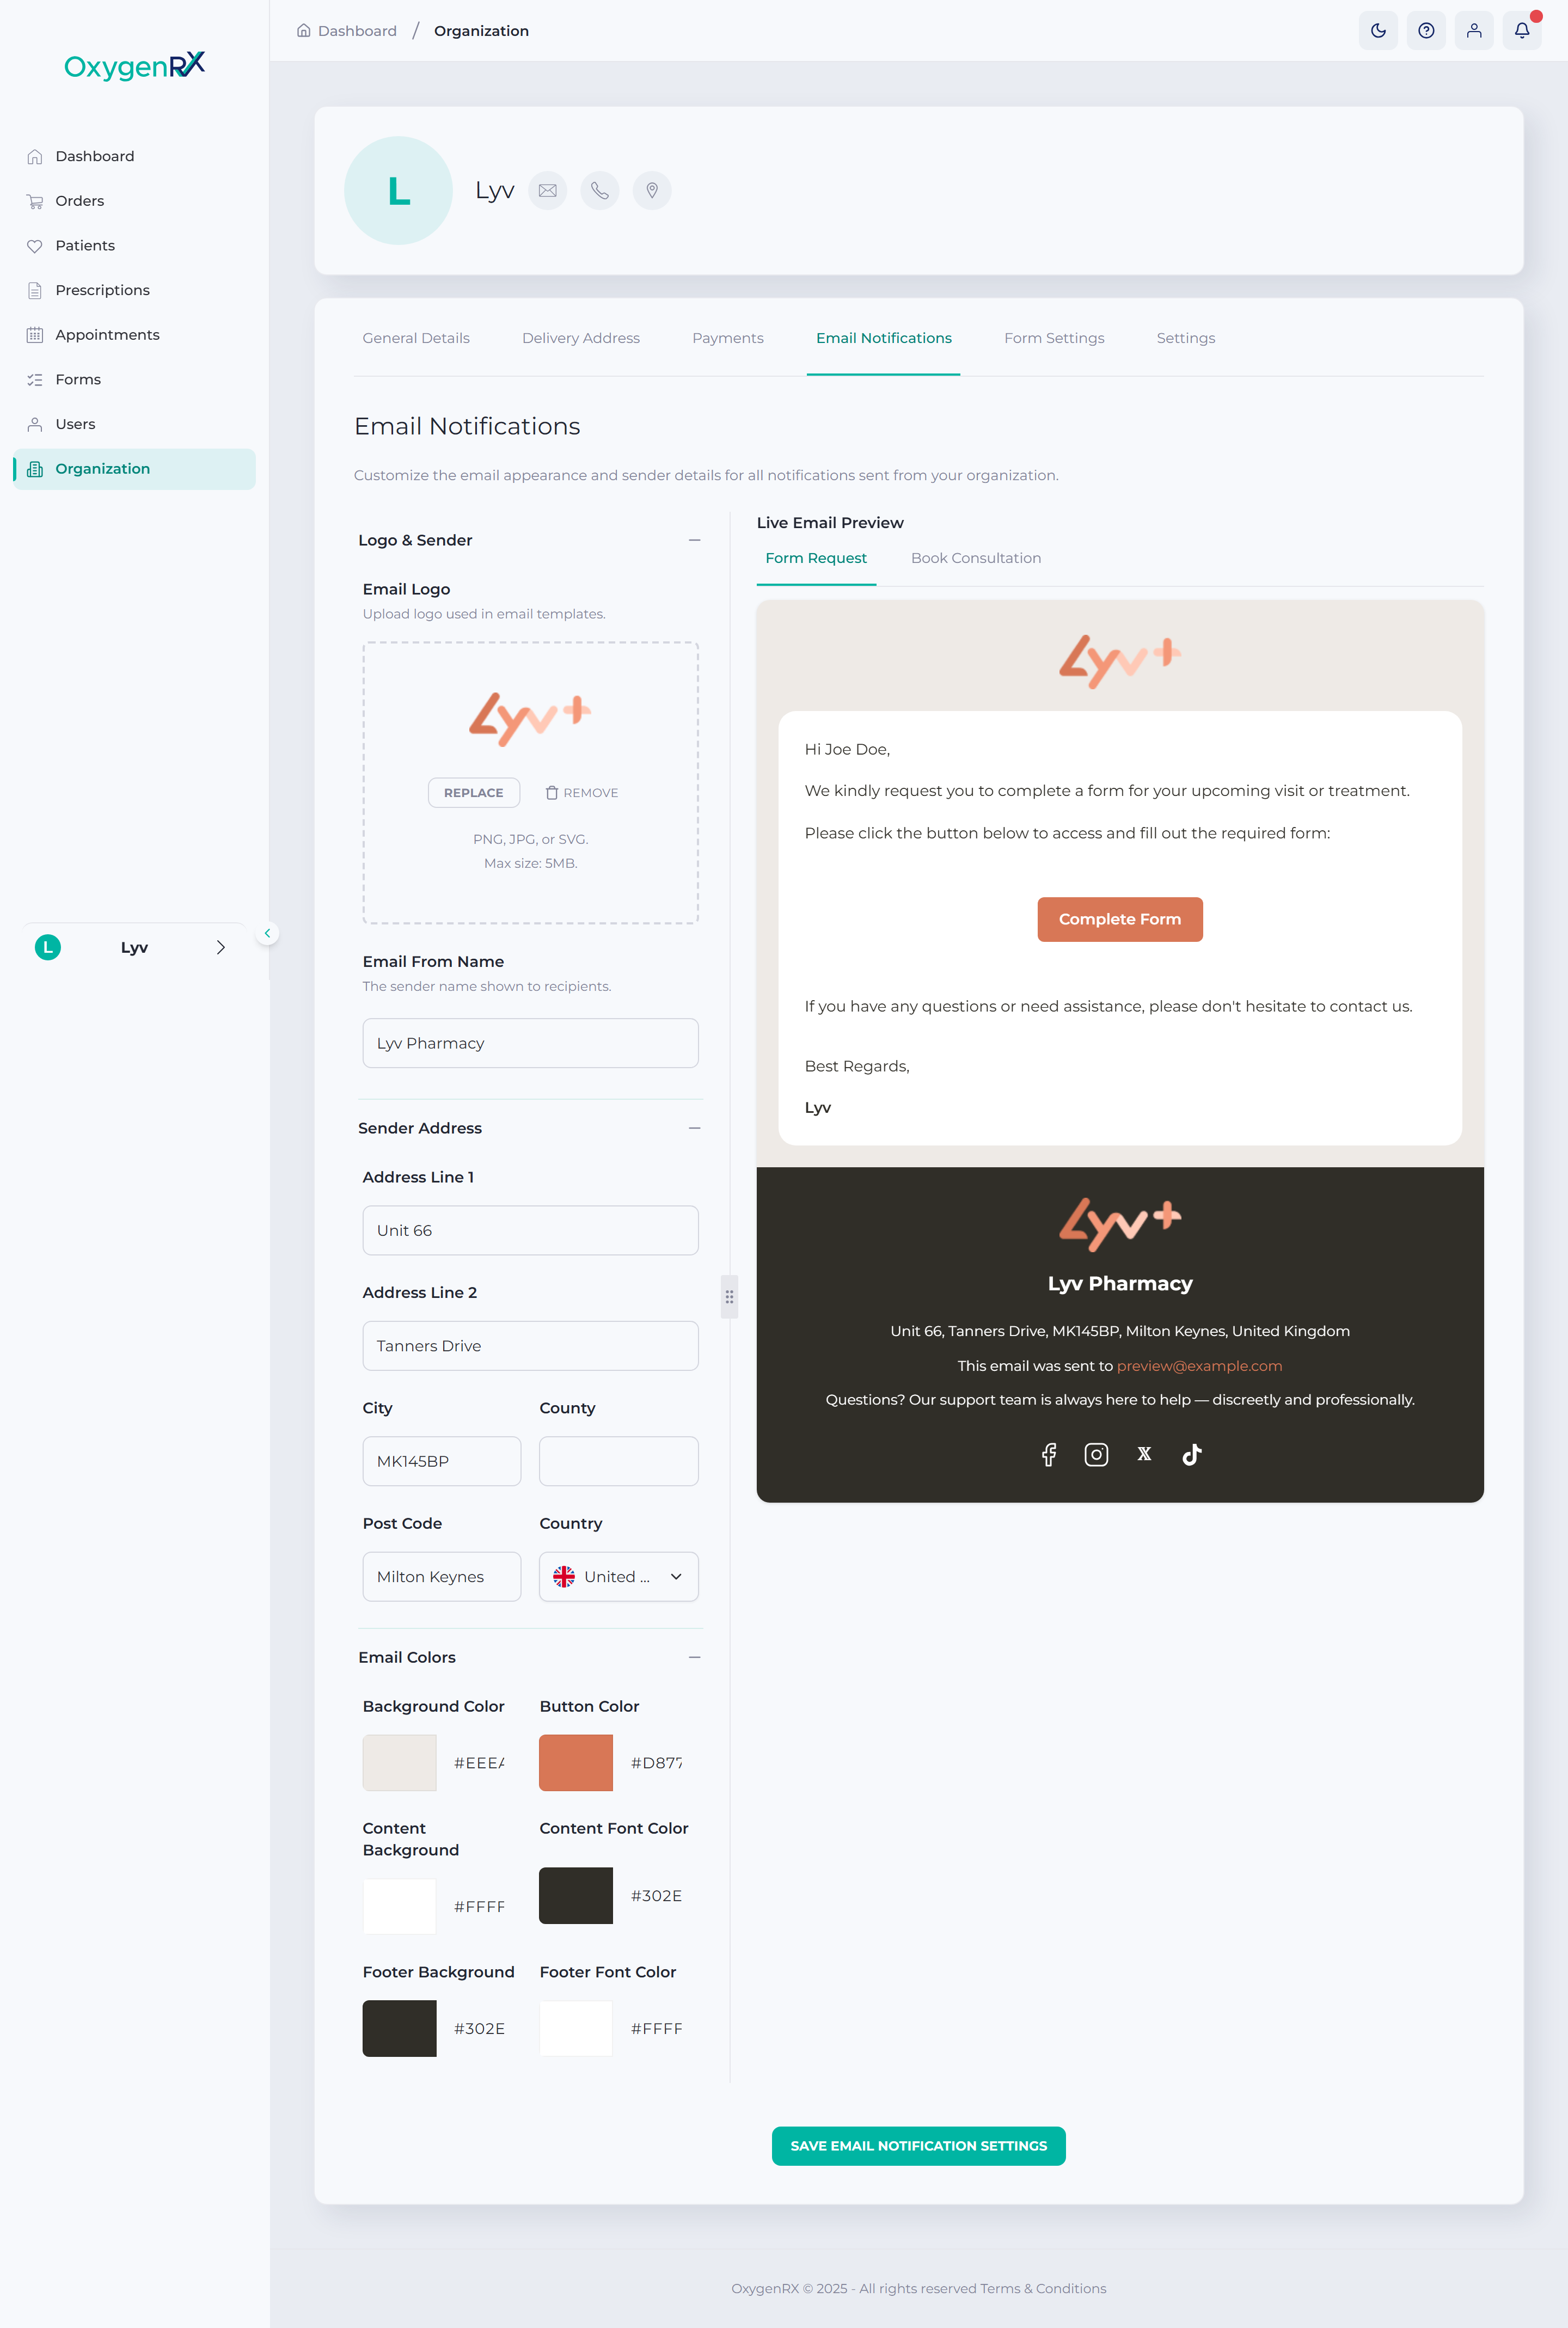
Upload a logo, type an Email From Name, and enter your sender address. Pick colors for the background, buttons, and text. A live preview on the right updates as you type. Click Save Email Notification Settings when finished.
Form Settings
Section titled “Form Settings”Brand the forms your patients fill in — logo and theme colors.
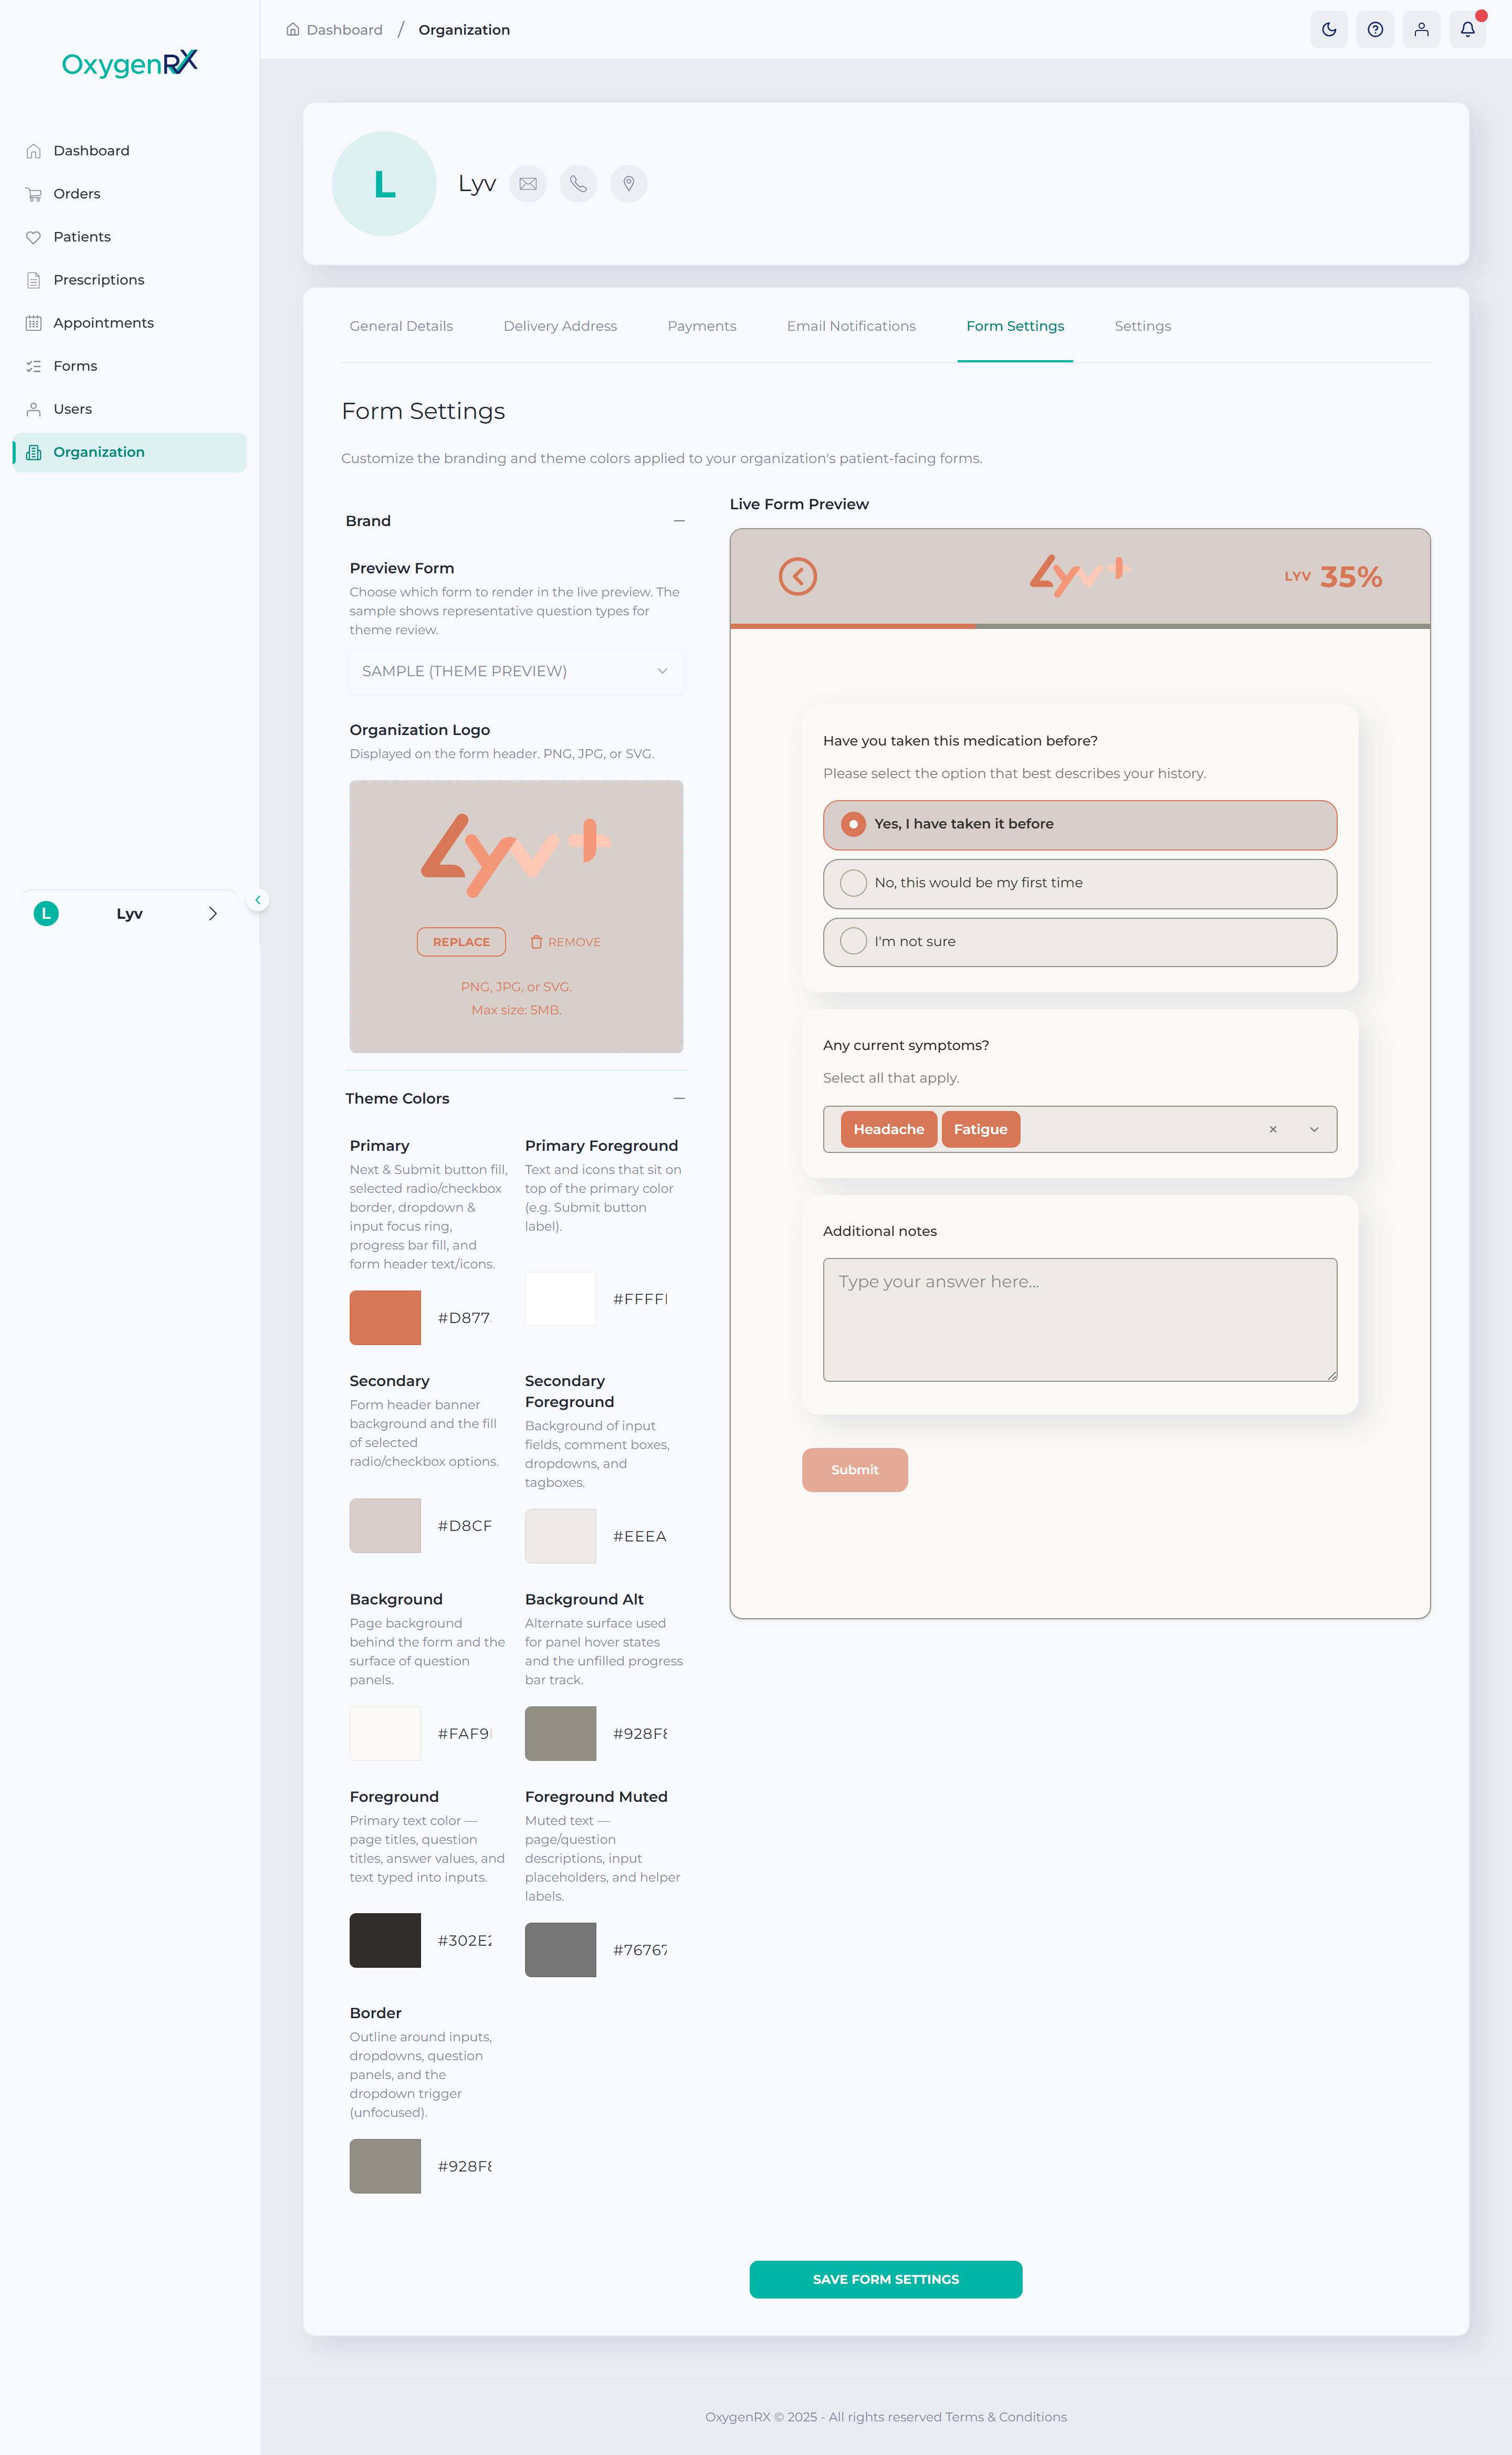
Upload your Organization Logo and choose theme colors for buttons, backgrounds, text, and borders. The Live Form Preview shows a real form styled with your choices. Click Save Form Settings when finished.
Settings (API and webhooks)
Section titled “Settings (API and webhooks)”This tab only shows if your organization has API access turned on. It holds your API Key, API Secret Key, and webhook connection details for technical integrations. Ask a Platform Admin if you need help here.
What happens next
Section titled “What happens next”General Details and Email Notifications changes apply the next time Oxygen emails a patient. Form Settings changes apply the next time a patient opens a form. Delivery address changes are ready the next time you place an order.
If something goes wrong
Section titled “If something goes wrong”- Saving General Details, Email Notifications, or Form Settings may ask for your two-factor authentication code. This is a 6-digit code that confirms it’s really you — see two-factor authentication. Enter it and click Confirm.
- “Enter a valid hex color” — check the color code you typed, or pick one of the presets instead.
- “File is too large. Maximum size is 5MB” or “Invalid file type. Please upload PNG, JPG, or SVG” — check your logo file and upload again.
- “Address Line 1 is required”, “City is required”, or “Postcode is required” — fill in the missing box and try again.
- No trash icon on an address? That’s your default address — set another address as default first.